Tips & Tricks
Index
- Keep state and logic separate
- Remember that events bubble up in the chart tree
- Give everything meaningful names
- Use the built-in “Editor Description” feature
Keep state and logic separate
State charts work best when you keep the state and the logic separate. This means that the state charts should contain all the rules for changing states while your code should only contain the logic that is executed when being in a state or when entering or leaving a state. You should not track the current state in your code, that is the responsibility of the state chart. The StateChart class deliberately does not expose the current state of the state chart for this reason.
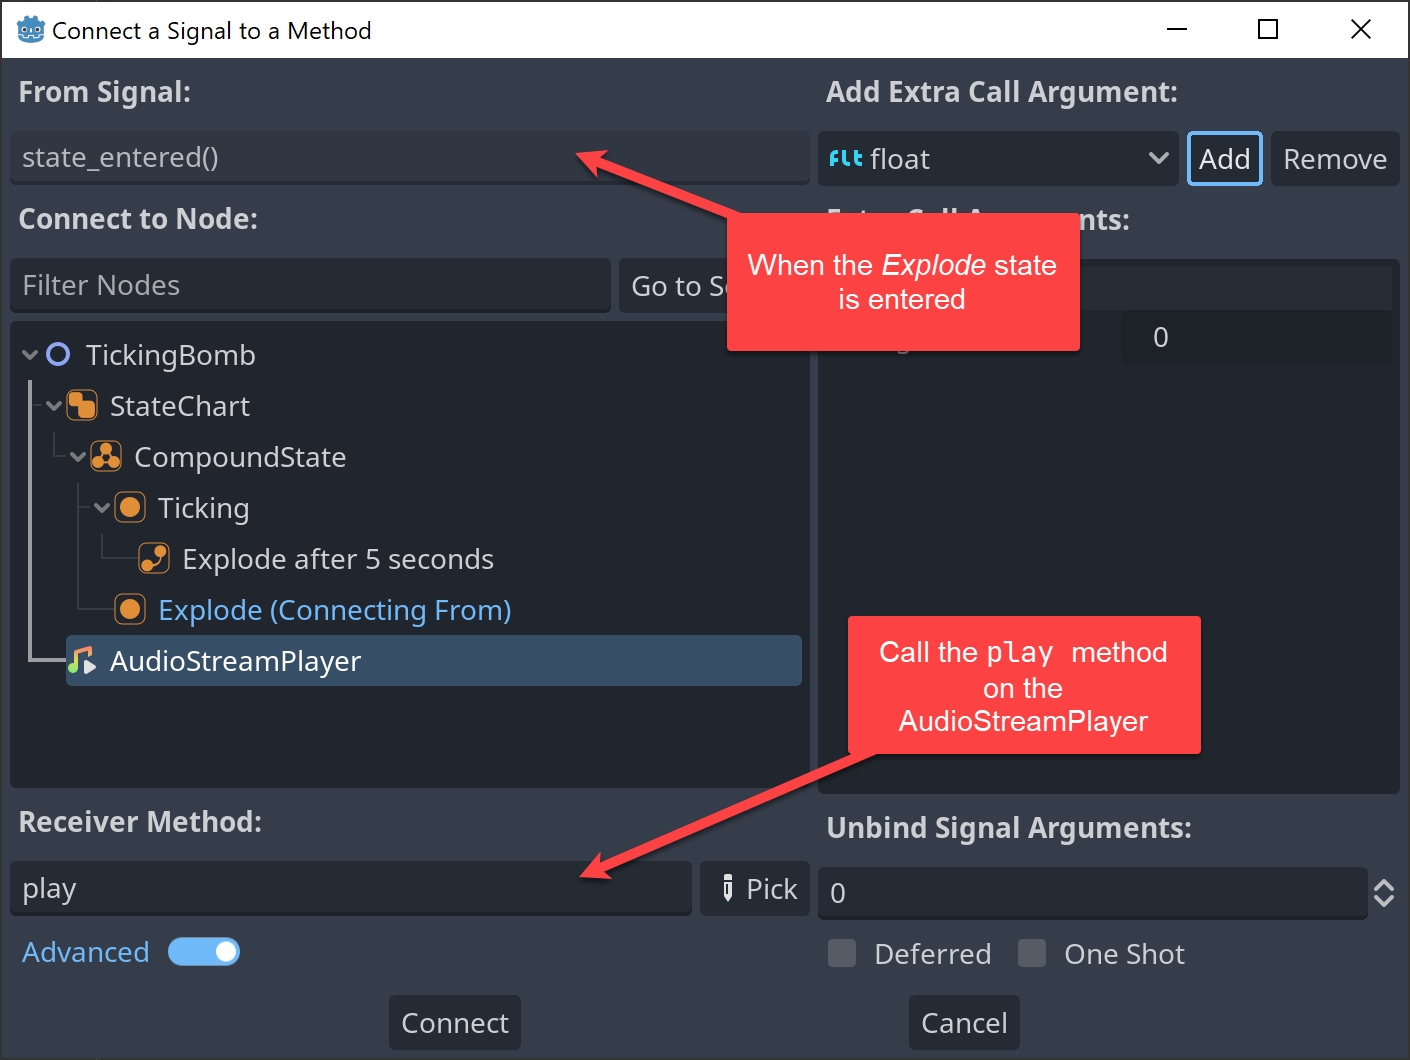
Instead, use the provided state events to trigger logic in your code. Many times you don’t even need to write any code. For example if you have a bomb that explodes and you want to play a sound when it enters the Exploding state, you can simply link up the state_entered signal of the Exploding state to the play function of your audio player.
If you only want to allow input in certain states, connect the state_processing or state_physics_processing signals to the same method of your code for all the states where the input is allowed. You can see one example of this in the platformer example, where jumping is only allowed in certain states:
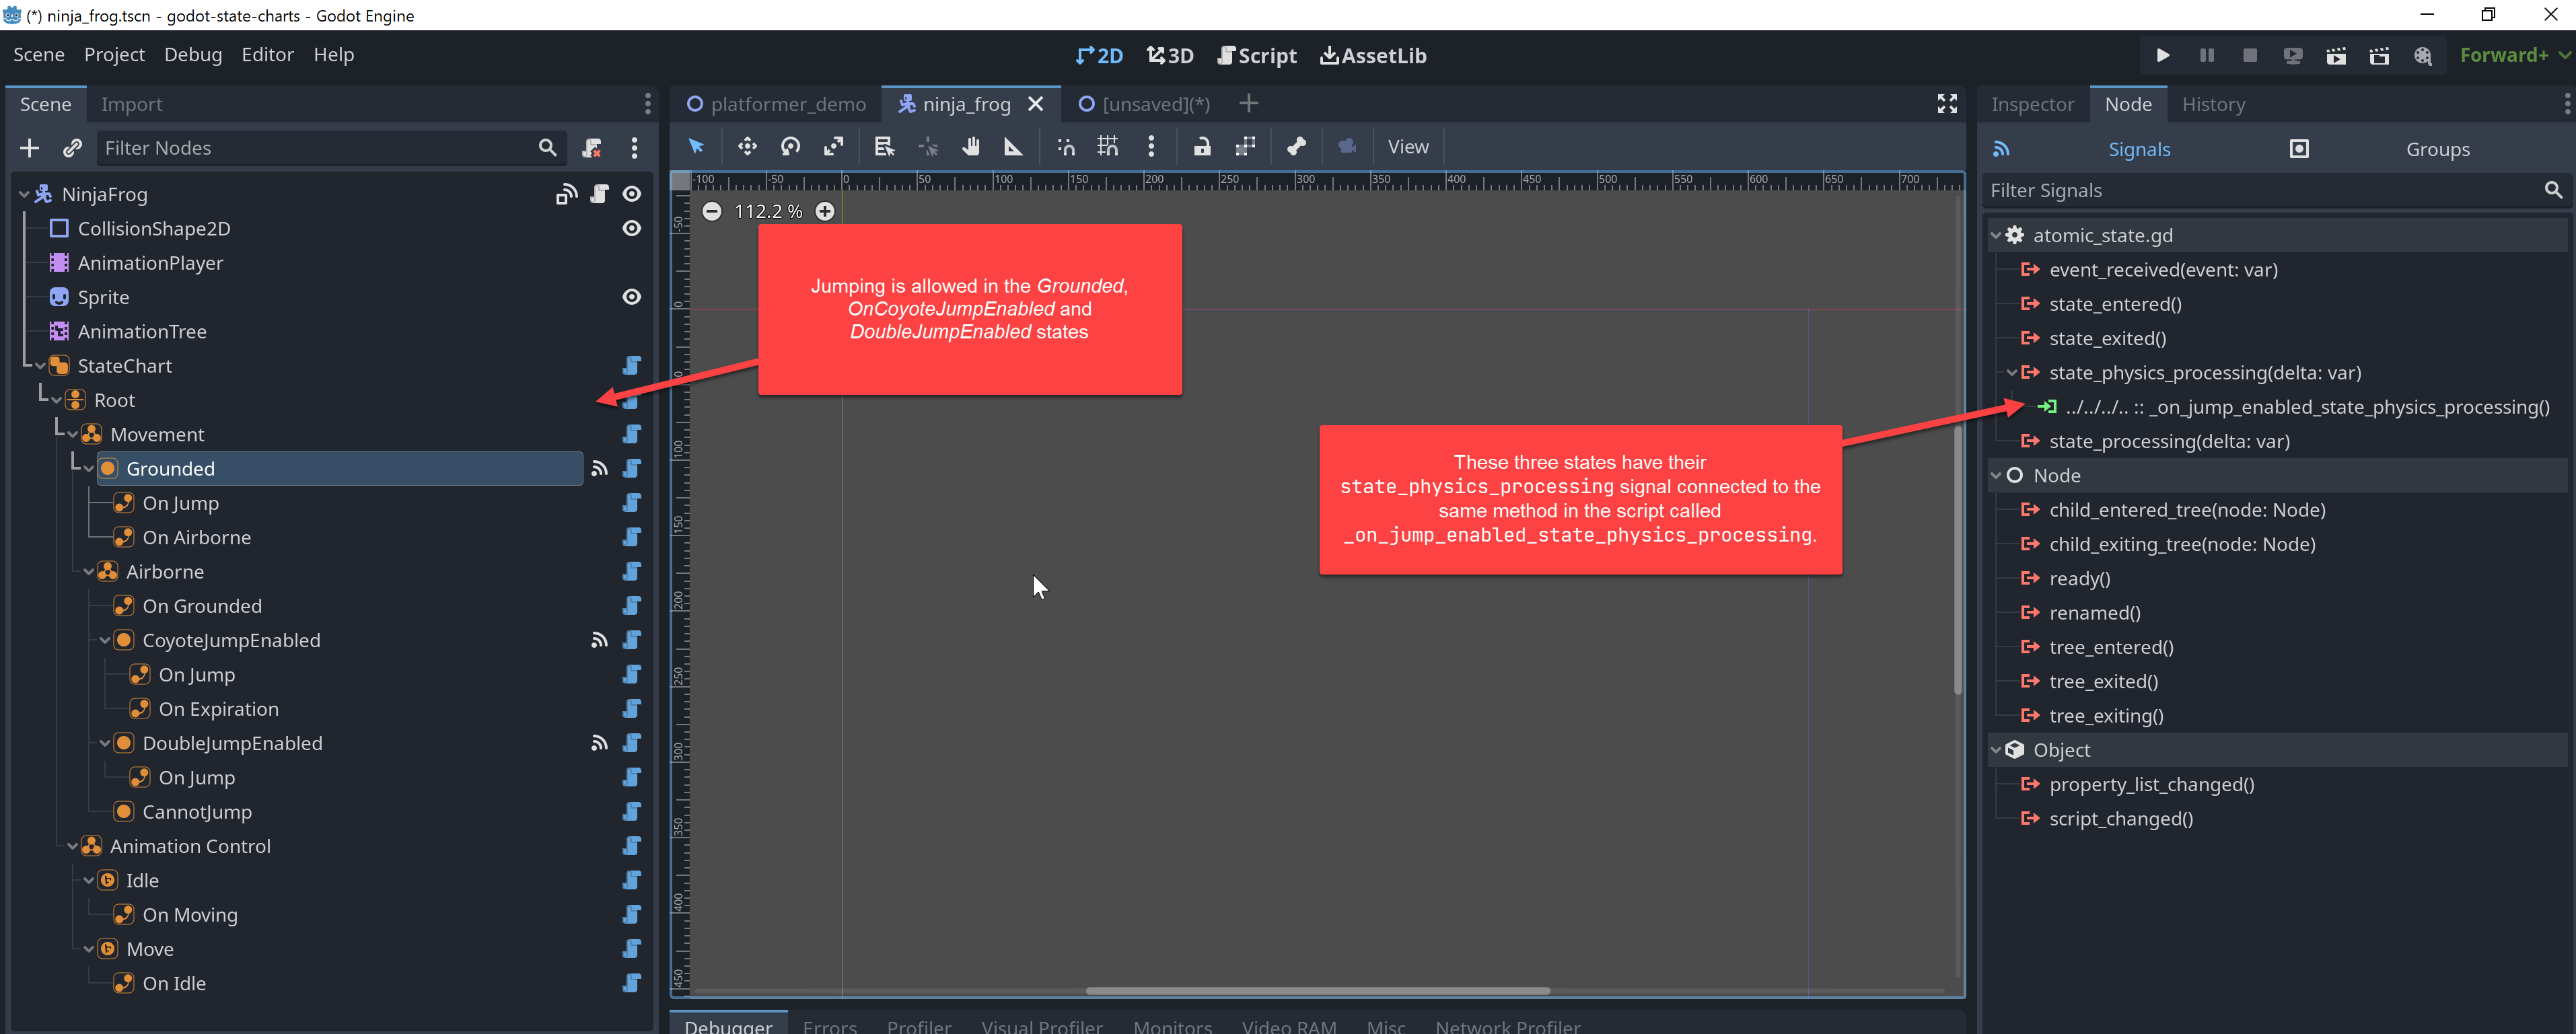
The way this is set up the code doesn’t need to know which states may exist or when you are allowed to jump. The state chart takes care of that and the jumping code is only executed when the state chart is in a state where jumping is allowed.
## Called in states that allow jumping, we process jumps only in these.
func _on_jump_enabled_state_physics_processing(_delta):
	if Input.is_action_just_pressed("ui_accept"):
		velocity.y = JUMP_VELOCITY
		_state_chart.send_event("jump")
Or in C#:
private void OnJumpEnabledStatePhysicsProcessing(float delta)
{
    if (Input.IsActionJustPressed("ui_accept"))
    {
        velocity.y = JUMP_VELOCITY;
        stateChart.SendEvent("jump");
    }
}
Remember that events bubble up in the chart tree
When you have multiple states that need to react on the same event, you can handle the event in the parent state. For example in the platformer demo, the frog can be in multiple different states while it is airborne.

However no matter in which specific airborne state the frog is, once it lands on the ground it always should transition back to the Grounded state. Therefore the transition for handling this has been added to the Airborne state. This way the transition will be taken no matter in which specific airborne state the frog is. Since no sub-state of Airborne (CoyoteJumpEnabled, DoubleJumpEnabled, CannotJump) handles the event, the event will bubble up to the parent state Airborne and the transition will be taken.
Give everything meaningful names
Because both states and transitions are nodes, it is very easy to rename them in the editor. Use this to provide meaningful names for your states and transitions. This makes it easier to understand what is going on in your state chart and also makes it easier to find the right node in the editor. Transitions should have the event they react on in their name, for example On Jump or On Attack. State names should be descriptive, for example Grounded, Airborne, CoyoteJumpEnabled, DoubleJumpEnabled, CannotJump. Since you will never type a state name or transition name directly in your code, you can use longer names that are easy to understand.
Use the built-in “Editor Description” feature
Godot has a very nice built-in comment field named “Editor Description”. Use this to write down some thoughts about why a state or transition exists and how it works in conjunction with other states and transitions. This is especially useful when you have a complex state chart with many states and transitions. Just like you write comments for your code, it is a good idea to write comments for your state charts.
